Siege & Fortresses
|
This section has not yet been updated to the 2.1.0 (2026) rules. |
Introduction
In the game of Warmaster it is possible to represent fortresses, walls, towers, castles and even entire cities on the tabletop by means of appropriately sized models. The scale of the game is ideally suited to fighting massive sieges with sweeping armies, mighty fortresses, lumbering war machines and towering engines of destruction.
In our Siege game system defenders and attackers will have to pay points for each part of fortification and Siege equipment and of course for their units, so that in the end it will be possible to play balanced Siege games with equal chances for all sides. Within those rules it should also be possible to play scenarios with small fortifications (like a watchtower, a traveller’s inn or a cemetery) without giving the defender too much of an advantage.
Big Sieges usually lasted weeks or even years, but these rules allow for actions like bombardments to take place within a single playing session. Warmaster is the perfect scale for uncomplicated Siege games.
That does not mean that longer Siege Campaigns cannot be supported by these rules. Special scenarios or campaigns might still follow.
Model fortresses
Walls, castles and towers can be handmade from card, plastic, balsa or similar materials. The small scale of Warmaster models means that it is relatively easy to produce a fortress using readily obtainable items. For example, plaster of Paris and plasticine can be used to create wall sections, towers and even gateways. However, the easiest material to use is thick card, such as the mounting card commonly sold for picture framing.
When making walls or towers for a castle or fortress where troop stands will be deployed it is necessary to make sure that the walkways are sufficiently wide enough to take a stand (i.e., 20mm). Similarly, it is also a good idea to make sure that such things as bridges, gateways and roads between buildings are at least 20mm wide so that stands can move along them. The following Siege rules very much depend on dividing the fortress in sections between 40 to 50mm, so when building a castle you should consider either making sections of this width or at least think of a way of marking those sections.
General siege rules
Generally in siege scenarios the Breakpoint for both armies is ignored. The game will only end when either one of the generals dies or when the turn limit for the scenario expires. Occasionally a scenario will state otherwise, in this instance the specific scenario rules take precedence.
When deciding to play a siege game the defender selects their units, fortifications and siege equipment first. The attacker may then spend the same amount of points on their troops and equipment according to the scenario description.
Additionally, the defender’s maximum unit limits are determined by rounding up to the nearest 1000 points. For example, a 1500 points army would use the minimum limit for a 1000 point army, but the maximum limit of a 2000 point army. This represents the higher number of well trained troops, artillery and equipment that tend to be found in most fortifications.
When the rules refer to a wall, this means a wall section between 40 and 50mm wide. When they refer to a tower, this includes the entirety of the tower.
Movement
High walls, tall towers and substantial tall buildings are considered to block the movement of all but flying units. Troops are therefore obliged to use gateways, doors or gaps when moving into or out of fortresses.
Only standard infantry and artillery can man the ramparts of a fortress. Cavalry, chariots, monsters, machines and infantry based in the same way as cavalry cannot move onto ramparts.
Infantry and artillery stands can move up, onto, or down from the defender’s side of ramparts as normal. It is assumed there are sufficient internal stairs or ladders to enable them to do so regardless of what the fortress model may look like. Vertical distance is ignored as far as unit formation is concerned.
Wall sections or towers work like extensions of stands upon them. If more than half of a stand is on a wall section its control area extends to the ends of this section as long as the area is not yet occupied. Shooting ranges may be measured from the edge of the occupied section. It follows that enemy troops may use initiative to charge or evade from occupied wall sections.
Up to four units placed on adjacent wall sections or towers may be moved as a brigade, even if the units themselves do not touch each other. This includes units in the courtyard that touch the appropriate sections. This rule allows troops to be rearranged even in a crowded fortress – for example, a unit inside a tower may change places with a unit standing on the neighbouring rampart with only one command, even if the units aren’t touching each other. Keep in mind that units in fortified sections are limited to half-pace movement.
Infantry stands from an attacking force can move over a wall and onto unoccupied ramparts as long as they are equipped with ladders or similar to scale the walls. Infantry can also use a siege tower to move directly onto a rampart. From there they may be ordered to move further.
In most cases attackers will be forced to fight defending troops before they are able to move onto the ramparts. This is explained further under Assaults.

Tir
Fortress walls, towers and gateways are sturdy constructions, impervious to arrows and light shot. They can only be damaged by shots from cannons and stone throwers. The Empire’s Steam Tank and Helblaster or Dwarf Gyrocopters fire a hail of small calibre cannon balls unsuitable for breaching walls.
To breach a wall or gateway or to collapse a tower you must shoot at it with a unit of suitable artillery or machines. Each 40 to 50mm long section of wall counts as a separate target. A tower is considered a single target unless it is very large (more than 50mm wide), in which case it must be divided into a suitable number of sections in the same way as a castle wall.
When shooting at a wall, gate or tower it is not necessary to shoot at the closest target, as is normally the case with missile fire, as the besiegers will generally pick a vulnerable point beforehand and concentrate their fire at that. If a player wishes to shoot at fortifications he can ignore the normal targeting rules and may shoot where he wants within the normal limitations of range and sight.
If you wish to shoot at troops on ramparts of walls or towers then the normal shooting rules apply and no account is made of damage on the wall or tower itself. Shots that are directed at the rampart can only cause harm to the troops and not to the fortification.
As fortresses are difficult to damage, a wall, gateway or tower counts as fortified (6 to hit) but has no armour.
Units on ramparts and towers can shoot over friendly troops on lower ramparts or the ground.

Structure tests
To resolve the effect of hits on a wall, gate or tower first roll to hit as normal. At the end of the Shooting phase make a Structure Test by rolling a dice for each hit inflicted on the building this round, plus one for each Destruction Token from earlier rounds.
If the result is higher than the Structure Resistance of the building it is destroyed. (This is similar to a Drive Rack roll, but without the movement of course.)
Otherwise, add a Destruction Token to the building. A maximum of one Destruction Token may be added for each round of successful shooting.
If there are Destruction Tokens on a building it must make a Structure Test at the end of the attacker’s Shooting phase, even if it took no hits in the current round.
Brognak, the orcish leader lets his two Rock Lobbers shoot at the gateway of the city of Hundstadt he is besieging. The results are 1–3–4–6–6–6. As any piece of fortification counts as fortified, Brognak has hit three times. The gate has 12 structure points, so the Orc player makes a structure test with three dice and needs to roll a 13: 2–3–6! 11 is not enough for destroying the gate, so it is marked with one Destruction Token for a round of successful shooting.
Next round Brognak only rolls one 6; even with the Destruction Token from the last round 2D6 is insufficient to break the gate.
After 5 rounds of shooting the gate still stands but there are 4 Destruction Tokens on it. This round all the shots miss and Brognak is thinking of biting the gate open with his own teeth. No Destruction Tokens are added, but with 4 Tokens already on the gate a structure test must be done. 3–3–4–5: 15! The gate cracks at last and the orcish troops rush towards the gap to take the city.
Once a wall is breached the entire 40 to 50mm long section is destroyed and collapses. Any stand on the rampart is destroyed. Where practical, the wall section can be removed and replaced by rubble or, if you wish, by a specially made section of breached wall.
Once a gateway is breached, the gate is assumed to have been blown apart. A stand on a rampart above the gate is not affected as it is the gate that is the target rather than the surrounding stone.
As with walls, any stand on the rampart or inside a tower is destroyed when it collapses. Where practical, the tower should be replaced with model rubble to show that it has collapsed.
Battering
Walls, towers and gates can also be breached by means of Battering rams or similar. First the battering unit ‘charges’ the targeted part of the fortification by initiative or order. The defending units on the ‘battered’ section and the directly adjacent sections may use missiles or boiling oil according the normal assault rules, which means that if the battering unit loses one stand the assault is failed and the assaulting unit has to retreat 1cm for each hit they have taken. Otherwise, the battering unit may ignore the defending troops to batter the structure. Each ram automatically inflicts one hit in the shooting phase. At the end of the shooting phase a Structure Test is made for the particular piece of fortification. Of course the particular wall may not be shot at when assaulted by a battering unit (as the battering unit is in the way) but adjacent wall sections may be shot at.
If the wall or gate fails the test it collapses. In the following combat phase the battering unit may proceed as if it had destroyed its first unit in combat and may fall back or advance. In the case of an advance the battering unit may ignore fortified troops as they storm into the courtyard. Touching units on ramparts are not taken in account during the following combat as this fight happens on different height levels.
In the case of destroyed gateways, units defending from above may not use boiling oil or similar attacks against the battering unit anymore as they already have, but they may use them against any following units that try to enter through the gateway.
If the structure is not destroyed by the battering attack add another Destruction Token and fall back 10cm with the battering unit.
Giants can also batter a wall with their clubs but no other monster is sufficiently large to do so.
One tower seems to be especially resistant. Although the orcish rock lobbers hurled load after load at the solid stone building it still did not show any sign of weakness. So Brognak orders his strongest giant to batter the walls of the tower and to his surprise the giant follows the order. Of course the tower may not be shot at anymore as the giant is “in the way” but there are 8 Destruction Tokens on it so at the end of the shooting phase a structure test has to be made. The results is 6–6–5–5–4–3–2–1 which is more than the 30 structure points the tower has. The tower collapses before the surprised giant and he is allowed to advance into the next enemy he can see.
Breaches
When a breach is caused, either by the destruction of a wall section or a tower, remove the destroyed part of the fortification (if possible) and replace it with a suitable marker or model.
In certain cases you will find that a breach caused in a wall or tower will destroy stands from a unit, possibly even destroying a stand in the middle of the unit, which would normally not be possible due to the Removing Casualties rules.
In that case count the number of wounds the lost stand had and proceed as if the unit had taken that many wounds by shooting. For example, a unit with three hits discounts two due to being fortified but the attacker may roll the last dice to determine drive-back, and the defender may still choose which stand he removes according to normal rules (even if that means that an intact wall section is left unguarded and a stand is put into the breach). The unit is driven back directly away from the wall no matter where the shooting came from.
Units attacking units in a breach are not drawn into combat with any units on adjacent standing wall sections. The reverse is also the case, in that troops assaulting a wall section do not count as attacking troops in adjoining breaches. This is one instance where corner-to-corner contact does not count. In addition, this means that units attacking breaches or wall sections in this way only have to spread out and maximise contact with adjacent troops that are on the same level as the attacked unit.
The last wall section of three has been breached by Brognak’s rock lobbers. The orc warriors charge the stand of halberdiers that is defending the breach. On the still-intact walls a unit of crossbowmen tries to lure the orcs into combat, but the orcs can ignore them as they are on another level.
A breach in a wall or collapsed tower can be moved through by infantry, cavalry or monsters. Any unit wishing to cross the breach must stop before it; either to fight any defending units or to wait for another order to move through – the area is too difficult to march straight through. Machines, artillery and chariots cannot move over the debris at all. The wreckage caused by a collapsed wall or tower counts as cover to defenders in the same way as a low wall or barricade. A breach can therefore be defended by troops on the other side once the wall or tower itself has been knocked down.
Gateways
Walls can have entrances of two broadly different sizes: large gateways and smaller doorways or gateways, such as postern gates and sally ports. The chances are that a model gateway won’t look wide enough for an infantry stand to move through – but we won’t worry about that. Just as in real life, troops will file through a gateway so we must assume our warriors can do the same.
Intact gates and doors are assumed to block line of sight for the attackers. This means that an attacking unit will not be able to move through a gateway and charge in the same move. This is because the unit cannot see its target at the start of its move. Defenders on the other hand are assumed to have peepholes in doors so a defending unit positioned directly behind a door or gate can see through it as if it were not there.
Characters and units move through gateways without any reduction to their movement. Giants are assumed to stoop if necessary!
Small doorways can be moved through by friendly infantry or cavalry and appropriate characters. Monsters, artillery, machines and chariots cannot move through smaller types of doorway or gateway. Cavalry riders are assumed to dismount in order to lead their mounts through.
A maximum of three troop stands (typically a single unit) and any number of character stands can pass through each small doorway or gateway in any Command phase. Enemy stands cannot move through small doorways or gateways at all.
Friendly units and characters can move through closed gateways without penalty. It is assumed that they have the wits to open them beforehand and close them once they’ve gone through. Enemy stands cannot move through a closed gateway but must smash it down first. If a defending unit for whatever reason ends its movement directly in or must retreat through the gateway while still fighting the gate remains open. If this unit is destroyed in combat the victorious unit may advance through the gateway into the next visible unit. Of course the gate may also be closed to block the retreating path of friendly units if all stands of the unit are outside. It is not allowed to close the gate if there are parts of the unit standing in or behind the gateway.
If a gateway in a wall is destroyed remove the appropriate wall section. Any units positioned on that sector are not destroyed but placed directly behind the gate. It is assumed that they hurried down from the ramparts to defend the suddenly open entrance against any attackers.
Gateways in towers are treated differently. The attacker has to choose if he attacks at the gateway or the tower. If the gateway is destroyed, attackers may move through it to attack troops behind. Units still manning the tower above may use their shooting, rock or boiling oil attacks in the same way as if an adjacent wall section is attacked.
Assaults
It is possible for infantry to attack an enemy on the ramparts of a fortress’ walls but not enemy on towers, as these are too high to reach. Depending on the construction of the model’s fortifications it may be necessary to designate some high walls, gateways or towers as being ‘too high to assault’. This is left to the players’ discretion.
Infantry can also attack a rampart from Siege towers as discussed later. In both cases this is called an assault. Only infantry can assault. Except for the odd examples discussed later, cavalry, chariots, monsters, artillery and machines cannot assault a fortress because they cannot attack fortified stands. Assaults are different from ordinary combat in several ways.
Infantry units can make an assault by charging up to the base of the defended fortress walls. The assaulting units do not have to form a battle line as in case of normal charge. The two sides then fight a round of combat as if they were touching.
As fortress models will never exactly match the size of a base it is necessary to adjust the normal rules concerning base to base contact in assaults. For our rules to work it is important that no rampart section is more than 5cm wide.
If a wall section is assaulted, the nearest units on adjacent wall sections may make stand and shoot attacks (even if the units on that section do not directly touch the attackers). They also count as being in corner-to-corner contact with the attackers in the following combat.
Units in towers are a bit different. As towers are built to provide extra defences, all units in a tower may stand and shoot at enemy assaulting adjacent wall sections, even if they won’t be in combat afterwards due to their higher position. Still they may only do that for the adjacent wall section that was attacked first. If the tower itself is being assaulted afterwards, units in it may stand and shoot as normal again. Have a look at Figure 1.
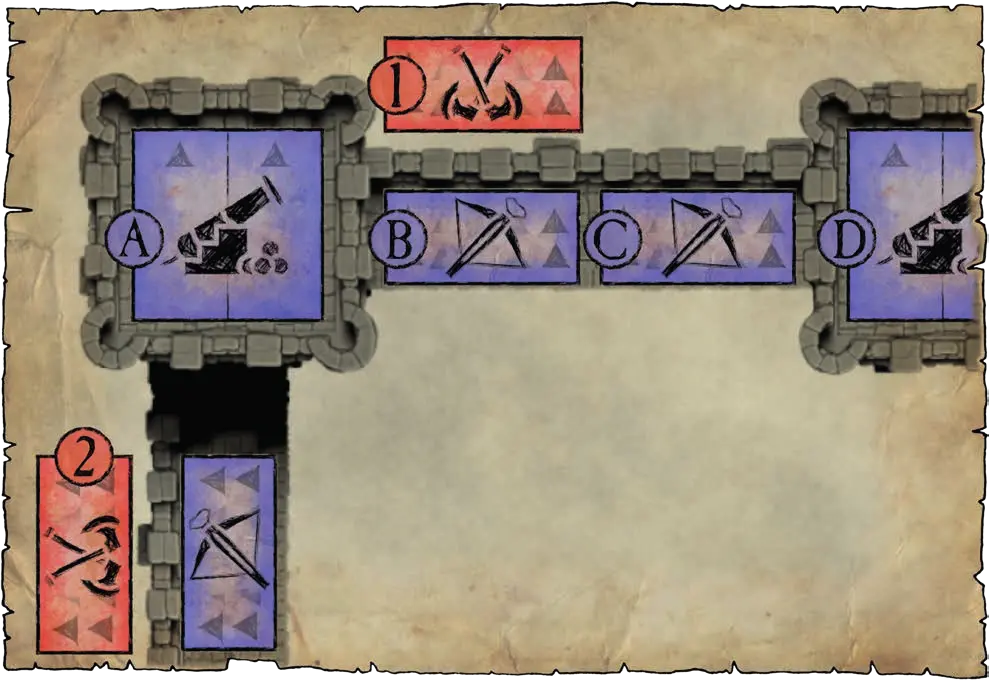
Cannons A cannot Stand and Shoot unit 2 as that is the second attacking unit.
Towers may also use their special “Stand and Shoot” ability against attackers with Sows, Siege Towers or Battering Rams. Those attackers benefit from the better armour roll their siege equipment provides. If an assaulting unit loses a stand by shooting or boiling oil attacks, the assault has failed and the unit retreats 1cm for each hit taken.
During an assault, no account is made for the effect of supporting stands for either side. In the dangerous, cramped and confused melee of an assault it is impossible for troops to support each other as they do on the open battlefield. Also, as units fighting on ramparts can hardly maintain a coherent formation, there is no need for stands to direct their attacks primarily to the front.
Missile armed defenders can shoot at troops making an assault in the same way as at troops making a charge. Any hits inflicted are carried over and count as if struck in the assault.
If the attackers win the combat round, their assault has succeeded. Beaten defenders must retreat down from the ramparts and away from their enemy. Measure all retreat moves horizontally. No account is made of the distance moved up or down (otherwise a stand could end up halfway down a wall!). Artillery stands are automatically destroyed if forced to retreat.
Victorious units automatically move stands onto the empty ramparts. If the unit won’t fit on the ramparts, some stands must be left at the base of the wall. Because combatants will be separated, the combat ends. No pursuit combat is fought during an assault.
In the event of a draw, the combat is deemed unresolved and carries on in the next combat phase. The assaulting units invested too much effort to scale the walls to simply fall back.
If the defenders win the combat then the attackers are thrown back and must retreat in the usual manner. The defenders remain in place. Defenders will not (and cannot!) pursue over ramparts.
Counter attacks on ramparts
Once attackers have taken a fortress’ walls it is likely that their enemies will counter charge. Stands holding the ramparts of walls against attacks from the inner side of the fortress do not count as being fortified. Because of the advantage of height they count as being defended.
Sometimes two opposing units end their movement side-by-side on adjacent ramparts with no line of sight to each other. It seems quite impossible in this special situation to ignore the enemy. A unit is therefore allowed to charge an enemy unit standing on a neighbouring rampart section by initiative, even if no line of sight can be drawn. For the same reason it is allowed to evade out of initiative, though the evasive movement in this situation will be away from the outer wall rather than away from the enemy.
If a unit upon a rampart is charged from an adjacent tower or rampart section it is assumed that the attackers attack in the open and get a +1 attacking bonus as they are coming from the same level. Only one stand may come into combat contact and neither side gains support from friendly stands. Units fighting this way may be placed flank-to-flank due to lack of space but this does not result in any attack penalties.
In this situation, a unit defending ramparts will be destroyed if it is defeated and obliged to retreat because it has nowhere to go (except over the fortress wall to its destruction). Victorious attackers automatically move up onto the recaptured ramparts but cannot pursue over walls. In case of a draw the combat is deemed unresolved and carries on in the next combat phase. Defeated units that were counterattacking from a tower can retreat back to the tower assuming there is still room.
A unit of Chaos Ogres manages to take three rampart sections. At one end of the rampart is a tower manned by Bowmen. At the other end are further rampart sections guarded by a unit of Men-at-arms.
In their next turn the Bowmen in the tower may charge the Ogres using initiative, since units in towers have 360 degree vision. The Men-at-arms may charge using their initiative as described above.
When these units do so, they are placed flank-to-flank with the Ogres as there is no room to place them face-to-face, but neither side suffers an attack penalty from this.
The result of the Bowmen’s four attacks is 6–6–3–2, the Men-at-arms’ is 6–4–3–2, and the ogres save none. The Ogres hit the Bowmen with 6–5–1–1 and the Men-at-arms with 6–4–3–3 (the Men-at-arms save none). The combat result is 4:4 and the Ogres (losing one stand) may hold their position while the Bretonnian troops retreat 1cm away from the Ogres.
Giants
Because they are so tall, Giants can attack troops on ramparts. However, they are too heavy and clumsy to scale the walls of a fortress and the people of the Warmaster world have sufficient sense to build their walls high! A Giant can just about reach sufficiently high enough to bash any enemy on the ramparts of the wall with his club. Towers and anything higher than a normal fortress wall are assumed to be out of his reach. If your model fortifications are such that there is doubt whether a Giant can reach them or not then the players should ideally agree beforehand which walls are out of reach.
A Giant can fight against an enemy unit on the rampart of a fortress wall but can’t pursue should the enemy retreat. Although he can clear the ramparts of foes, he can’t take and hold ramparts as infantry can.
Giants can use their clubs to batter in the same way as a Battering Ram. A Giant can only do this if there are no troops on the ramparts that he can fight, otherwise he must fight the defenders instead. When attempting to batter walls, each Giant inflicts one automatic hit and damage is calculated in the same way as for Rams.
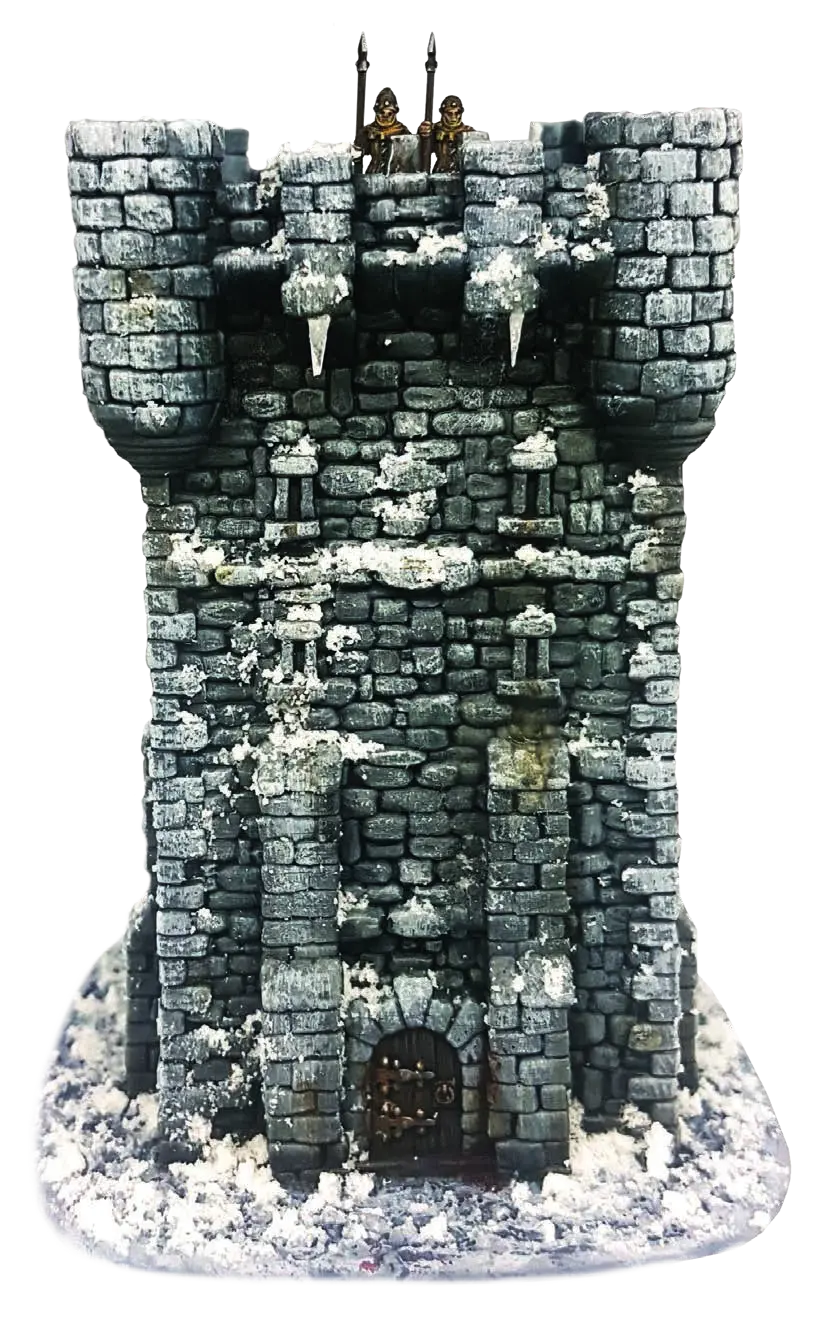
Towers
Towers are usually the most important element of any defensive structure. They are very tough to knock down and incredibly difficult to assault, whilst providing an ideal position to pour missile fire onto the attacking army. A tower may only be assaulted from either the courtyard or from the ramparts of adjacent wall sections. This is because a tower is generally much too high to assault with even the longest ladders or tallest siege towers, so the only way in is through the doors.
The number of stands that a tower can hold is determined by its base area. The standard tower as defined in the defender’s fortification list has around 40–50mm edge length and may hold up to three stands or at least one unit of troops (but not more than two units). Towers with more edge length cost double points and may hold up to 3 units but no more than 6 stands. This represents units not only being positioned on the roof of the tower, but all throughout its height, probably stationed at gun ports or arrow slits.
Free-standing lone towers only have one facing that can be attacked in this way. Whichever facing this is must be declared by the defender before the start of the battle. This facing is assumed to be the one with the door in, whether it is on ground level or high up with a removable ladder.
Towers that are part of larger fortifications are assumed to have an entrance at every facing and level linked to another fortress section. So towers always have an entrance to the courtyard and to each rampart that touches them no matter if the actual model has one displayed.
Missile units in towers count as having a 360° fire arc. This means that they must target the closest eligible enemy unit to the tower if they wish to fire their missile weapons. Distances are measured from the edges of the tower. In addition to this, all missile units in a tower may stand and shoot at units that attack any facing of the tower they occupy as long as the shooting stand is not yet in combat. They may also shoot if they are not taking part in the assault themselves. The only stands that cannot do this are those that are already engaged in combat with another unit that has charged the tower.
When assaulting a tower in this way only one stand may attack each facing of the tower (usually only one or two are eligible in this way). These must be from different units and the defender may also only defend with one stand per facing (although they must defend with one stand on multiple facings if there are insufficient defending stands). Defending stands never count as being flanked.
When charged, the defending stands in a tower count as fortified. If the attacker wins the first round of combat it is assumed that troops could make their way into the tower. The attacker and defender continue to fight with one stand, but the attacker will gain the normal pursuit bonus. The defender has defended status in the following rounds of combat. Defenders of a tower can never be driven out of a tower – all units in a tower must be destroyed before the attacker can occupy it.
In the case of a tower that holds more than one unit, the defender chooses which unit takes the attack. This unit handles all attacks until it is either wiped out or the attackers are driven off. If the tower is attacked by more than one unit the defender may choose which unengaged defending stand or unit takes the attack. However the following combat will count as one big combat.
If the attacker manages to wipe out the first defending unit he may advance once into the next defending unit and the whole assault begins anew with the defender being fortified.
If the attackers lose a round of combat they are placed outside the tower’s wall as if it would have been the front edge of the attacked unit. So a unit losing by 2 is placed 2cm away of the attacked wall.
Other than this, all the normal rules regarding attacking fortifications stand. For example, if by some miracle the attacking troops do manage to wipe out all the defenders in a tower, then they do not receive any advance charge move. The only option available to them is to consolidate their position and occupy the tower.
Manfred von Hornberg, commander of a lonely watchtower at the Sylvanian border is attacked by a Vampire horde. The tower is defended by a unit of cannons and a helblaster.
First a unit of grave guards attacks the entrance of the tower. They are welcomed by 8 shooting attacks from the helblaster and another 4 shots by the cannon. The grave guards however only take 2 hits (one more and the assault would have failed as the guards would have lost a stand). Hornberg decides that a stand of the cannons has to counter the attack. At the same time a unit of vampire bats attacks the roof of the tower. They are shot at 8 times by the helblaster, 2 times by the one free cannon stand and receive 3 wounds. The second stand of the cannon counters the bats.
The grave guards attack 3 times and roll a total of three 6s, the bats roll another 6. The cannon wounds the guards and the bats once. The grave guards lose one stand and so do the bats but the cannons are destroyed. The bats have to retreat as they are flyers so only the guards try to go on charging the remaining helblaster. Another round of stand and shoot follows but the guards only lose one wound. They attack 3 times but no 6 is rolled so the helblaster survives and the guards have to retreat 1 cm out of the tower.
Manfred von Hornberg sighs in relief, but knows the worst is yet to come.
Gateway towers are exactly like all other towers with the one exception that a gate leads through it. The gate may be attacked on its own and the defenders manning the gateway tower are not part of the combat that follows, but they may use boiling oil or stand and shoot against the attackers.
Flyers attacking fortifications
Flyers may attack fortified targets in the same way as infantry, hitting on 6s with no charge bonus. They may never occupy fortifications and thus if they win a round of combat against troops in fortifications, they may not pursue them for a second round of combat and may either stand their ground, or fall back. The defenders, however, do still have to retreat.
Flyers are unique in that they are the only units that can actually attack units stationed in a tower without having to do so from the courtyard or adjoining ramparts. The normal rules for attacking towers still apply though, so the defenders will not retreat and all missile-armed troops will be able to stand and shoot at the attacking flyers.
Walls, ramparts and towers are difficult terrain for flying creatures so if they are attacked and lose a round of combat or if they are pushed back they are destroyed.
Of course if flyers try to assault fortifications, boiling oil attacks cannot be used against them.
Mouvement des personnages
As commanders are too valuable to risk their lives uselessly it is not allowed for them to enter fortress sections unless they are part of a unit. They are allowed to be placed on unoccupied fortress sections or onto sections that are occupied by their own troops.
If a character is on a fortress section when it is touched by an enemy unit it must join a friendly unit within 30cm. The buildings or the height of the walls do not restrict the movement of the character, regardless of any mount.
Magic
Fortress builders are wise to the ways of wizards and sorcerers, and use powerful magic-sapping incantations and carve protective runes into the walls. It is not possible to use magic that crosses the ramparts or walls of a fortress.
However, it is allowed to use magic spells on units that are assaulting a wall as well as in a combat that takes place there. So for example an assaulting unit may get extra attacks by “Rage of Chaos” and these extra attacks will stay as explained in the rules even if the unit crosses the ramparts. “Raise Dead” will also work on or even behind the walls of the fortress as long as there is enough room to place the raised unit and the raised unit touches any units in combat.
Siege machines
No besieging army would be complete without siege towers and rams with which to pound the enemy’s fortress to pieces. Some races have developed their own versions of these devices but all function in more or less the same fashion and have equal effectiveness.
Concerning Victory Points, destroyed or lost Siege Machines immediately give the opponent their victory points no matter if the unit carrying them is destroyed or not.
Siege Machines like Siege Towers, Battering Rams or Sows may use initiative to attack the nearest wall section (towers may be ignored).

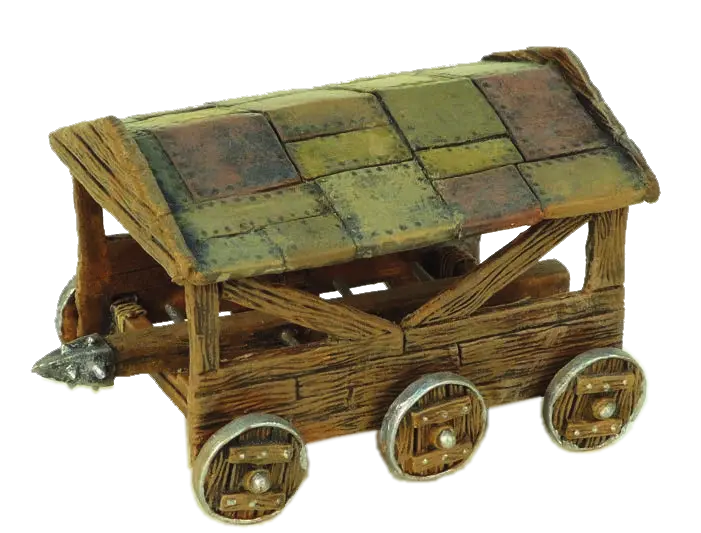
Siege towers
| Troop | Type | Attack | Hits | Armour | Command | Unit size | Points | Min/max |
|---|---|---|---|---|---|---|---|---|
Siege tower |
M |
0 |
3 |
3+ |
– |
1 |
20 |
–/– |
A Siege Tower is a massive wooden tower that rolls forward on huge wheels. It is pushed to the enemy’s fortress by troops who are protected by its stout timbers. Once the tower reaches its target, a ramp descends allowing the sheltering troops to swarm over the walls.
A Siege Tower is a unique kind of machine. Its sole purpose is to deliver troops onto the enemy’s walls. A Siege Tower must be assigned to a unit of infantry. To represent the fact that they are really inside the Siege Tower, the unit is arranged directly behind in column.

As Siege Towers are such huge constructions the same shooting rules apply to them as to wall sections. All shooting enemy units within reach of Siege Towers may choose which Siege Tower they want to shoot at (but if they choose to shoot at units without Siege Towers they still have to shoot at the nearest visible unit).
All enemy shots against the unit are assumed to hit the Siege Tower because the troops are actually inside it. A Siege Tower and the unit inside it cannot be driven back by missile fire.
Should a Siege Tower be destroyed by shooting, its accompanying infantry will abandon it and may continue to fight normally.
The Siege Tower has no value in close combat. If the unit is attacked, the Tower is simply ignored. If the unit is forced to retreat, the Siege Tower is destroyed. Units in Siege Towers may pursue or advance in combat leaving their machine behind which effectively means the Siege Tower is destroyed.
The Siege Tower can be pushed forward at a speed of 15cm. As it is an incredible effort to move a massive construction like a Siege Tower, command rolls get an extra −1 from second command onward (so the second command would work at a −3 instead of −2).
A unit accompanying a Siege Tower cannot make way for other units. If all its accompanying infantry are killed in combat before it reaches the walls, the Siege Tower is considered to have been immobilised or destroyed.
Once the Siege Tower reaches the enemy’s walls it has effectively done its job. As soon as the walls are reached, the accompanying infantry can assault the defenders or, if there are no defenders, they can occupy the wall as described below.
A Siege Tower is usually not tall enough to reach a tower. However, if there is doubt because a tower is especially low, the players should agree before the game whether it can be assaulted like this.
Troops making an assault from a Siege Tower cancel out the advantage of fortifications. Both sides count as being in the open (4+ to hit) and the assaulting stand gets the usual +1 bonus for charging.
The assaulting unit fights with only one stand (the warriors at the top of the Siege Tower) whilst the defenders fight with all stands that would theoretically be touching were it possible to move all the stands properly into place!
As stands touching corner-to-corner would normally fight, defending stands adjacent to the stand directly facing the Siege Tower will fight, assuming they are otherwise free to do so.
Once a Siege Tower has reached the walls and is not destroyed, up to three stands of infantry can move up it and onto the walls in subsequent turns, assuming that there is room for them to spread out whilst remaining in physical contact with each other. (Once stands have moved onto the ramparts they cannot move further that turn, even if unopposed).
If a unit assaulting walls via Siege Tower loses the combat and retreats 4cm or less, it still counts as being in the tower and can assault again in the next turn. If the unit retreats more than 4cm and the wall section it faces is subsequently occupied by the enemy, it is automatically destroyed. They push it over! Troops defending walls from a counter attack cannot retreat down a Siege Tower and enemy cannot pursue or advance using a Siege Tower.
If the unit pushing the Siege Tower consists of missile armed troops, all stands can shoot as if they were positioned on top of the tower. This brings them up to the same height as the walls. Targets on the ramparts of walls count as being defended from a Siege Tower rather than being fortified. Targets in higher towers still count as being fortified.
Battering rams
| Troop | Type | Attack | Hits | Armour | Command | Unit size | Points | Min/max |
|---|---|---|---|---|---|---|---|---|
Battering ram |
M |
0 |
3 |
3+ |
– |
1 |
10 |
–/– |
Battering Rams are mounted on a wheeled chassis and protected by a wooden roof so that troops inside can push the ram forward under cover. A Battering Ram can be incorporated into a Siege Tower in which case it simply combines the attributes of both.
A Battering Ram’s purpose is to affect a breach in the enemy’s gate or walls.
A Battering Ram must be assigned to a unit of infantry. To represent the fact that they are inside the covered frame the unit is arranged directly behind in column. All enemy shots against the unit are assumed to hit the Battering Ram because the troops are actually inside it. A Battering Ram and the unit inside it cannot be driven back by missile fire.
Should a Battering Ram be destroyed by shooting, its accompanying infantry will abandon it and may continue to fight normally.
The Battering Ram has no value in close combat. If the unit is attacked, the Ram is simply ignored. If the unit is forced to retreat, the Ram is destroyed. If units with Battering Rams pursue or advance in combat they leave their machine behind which effectively means it is destroyed.
The Battering Ram can be pushed forward at 15cm. A unit accompanying a Battering Ram cannot make way for other units. If all its accompanying infantry stands are killed before it reaches the walls, the Ram is abandoned and is considered to have been immobilised or destroyed.
Once the Ram reaches the enemy’s walls it can begin to batter! The rules for battering are described above. The Ram must be accompanied by a unit of infantry of at least one stand in order for it to batter (they provide the muscle). A unit may not batter and assault at the same time.

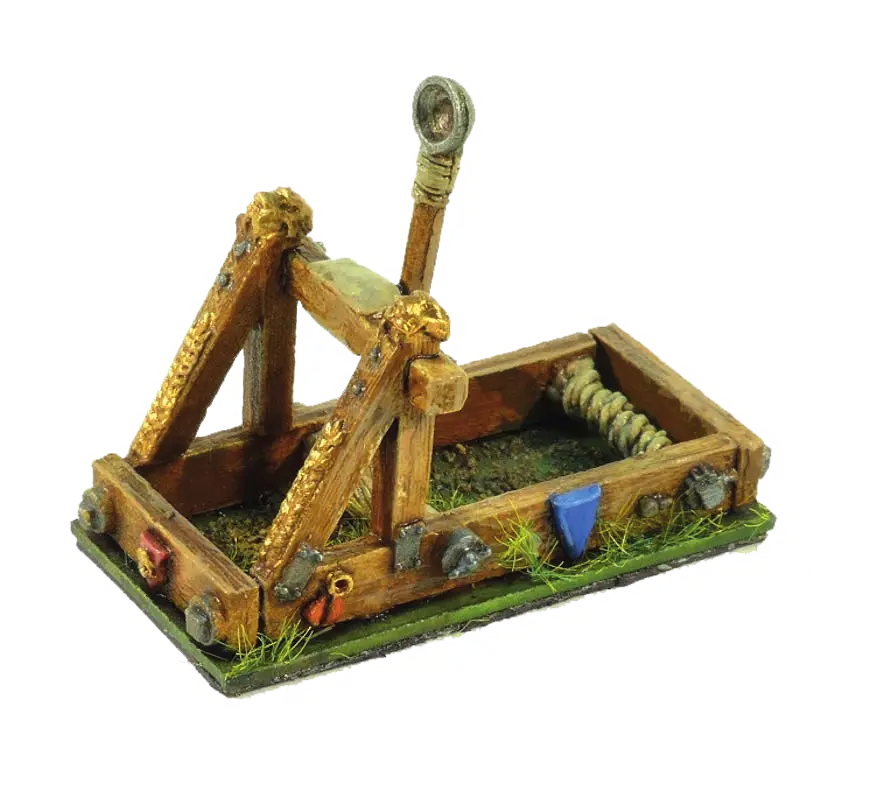
Sows
| Troop | Type | Attack | Hits | Armour | Command | Unit size | Points | Min/max |
|---|---|---|---|---|---|---|---|---|
Sow |
M |
0 |
3 |
3+ |
– |
1 |
5 |
–/– |
These are roofed and wheeled structures that offer protection to troops as they advance towards a castle. A Sow is very much like a big shed on wheels or, to put it another way, a Battering Ram without a ram. A Sow is represented by the same rules as a Battering Ram except that it cannot batter.
Sows have no value in close combat. If the unit is attacked it is simply ignored. If the unit is forced to retreat, the Sow is destroyed. Units with Sows may pursue or advance in combat leaving their machine behind which effectively means the Sow counts as destroyed.
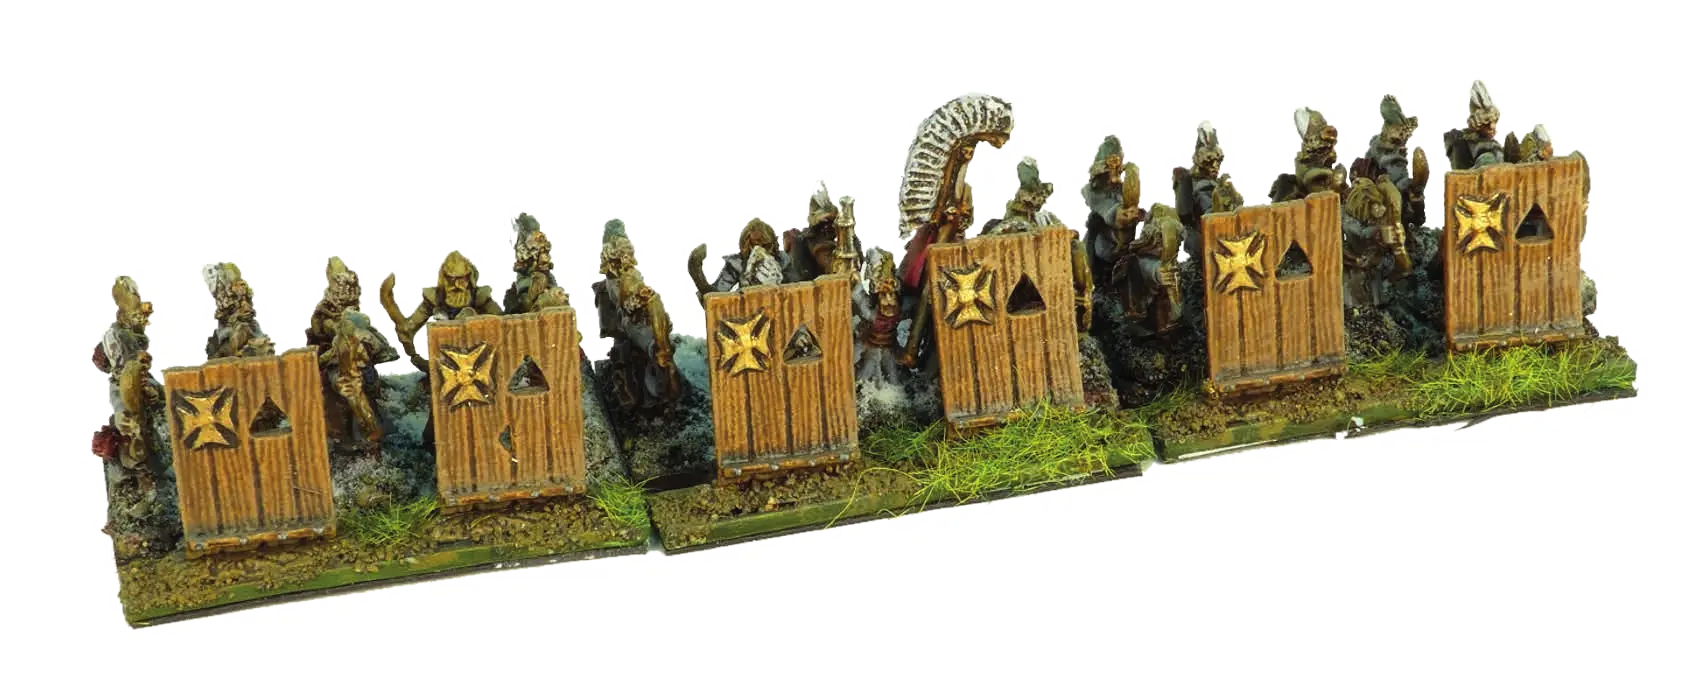
Mantlets
These are large mobile shields made from stout wood. They offer protection to troops behind them and can gradually be shuffled forward without exposing the sheltering troops to enemy fire. They are used by infantry units and are provided with arrow slits through which missile armed units can shoot.
In a siege game, units of infantry can have Mantlets for +10 points per unit. This is enough to cover the unit’s frontage and the unit is considered to be in a defended position. If it charges, it must abandon its Mantlets. If the unit suffers casualties, it automatically abandons any unnecessary Mantlets (these cannot be used by other troops). If retreating or pursuing in combat its Mantlets are abandoned if they haven’t been already.
If a unit equipped with Mantlets is driven back by shooting it will carry its Mantlets with it. However, if driven back more than its half pace move (10cm for standard infantry), the unit automatically abandons its Mantlets as it moves. As units carrying Mantlets count as occupying defended positions, they deduct one dice from their drive back distance.
A unit can abandon its Mantlets at any time during the Command phase, in which case it is not restricted to one move that Command phase. In this case, the Mantlets are overturned or cast aside and removed from the battle.
Boiling oil or rock droppers
Defenders are liable to throw anything they can get their hands on at enemies trying to scale the castle walls. Well prepared defenders will have amassed numerous large rocks, prodigious amounts of garbage, masonry, furniture, statuary, dead horses, stone sinks, anvils and the like. Of course, the professional choice is boiling oil but scalding water and hot sand are also used to good effect. We won’t worry much about the exact type of missile. For our purposes it’s enough to assume that the defenders have something appropriate to hand. For the sake of explanation, we’ll assume that Boiling Oil is our preferred option.
A 40 to 50mm wide section of wall may be provisioned with Boiling Oil or Rock Droppers. This may be used by any unit of troops manning that section.
If an assault is launched against a fortress section which is provisioned with Boiling Oil or Rock Dropper units then this and any adjacent sections may use their equipment against the assaulting enemy. Boiling Oil or Rock Droppers can also be used against units making an assault via Siege Tower or Sow but the attackers may use the 3+ armour save of their Siege equipment instead of their own.
Note that a unit may only use one Stand and Shoot attack. Units equipped with bows or similar have to choose if they use Boiling Oil or their bows when they are assaulted. They may never use both.
Boiling Oil or Rock Dropper attacks are worked out immediately before normal combat at the same time as shots at chargers. Any hits inflicted are carried over into the combat and count as having been struck in the first round. Roll a dice and consult the chart below.
| D6 | Result |
|---|---|
1 |
No effect, you miss or the enemy successfully protect themselves from your barrage. |
2–3 |
The enemy unit suffers 1 attack with a −1 on armour saves. |
4–5 |
The enemy unit suffers 2 attacks with a −1 on armour saves. |
6 |
The enemy unit suffers 3 attacks with a −1 on armour saves. |
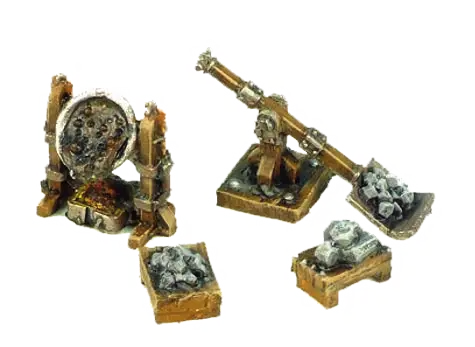
Tribock
| Troop | Type | Attack | Hits | Armour | Command | Unit size | Points | Min/max |
|---|---|---|---|---|---|---|---|---|
Tribock |
Art |
1/6 |
4 |
0 |
– |
1 |
120 |
–/1 |
Shooting: Range 20–120cm, 6 Attacks
As the Tribock is such a giant machine it has to be placed on a special stand with a front edge of 40mm and flank edges of 60mm.
For siege use only! May not move once it is deployed. Must be deployed before any other unit.
Shooting straight ahead: Unlike normal shooting units the Tribock has a very restricted view. It can only draw line of sight to targets that lie in a strip that extends straight ahead from the front edge. So the Tribock only has a 4cm wide line of sight. For targets outside this strip it must be ordered to turn. If the order is failed it does not fire that turn.
Any Hits caused by the Tribock allow no save.
Because of its immense size the Tribock has a range of 120cm and a minimum range of 20cm as the slingshot like nature of the weapon makes it impossible to shoot at closer targets. This obviously makes units that are under 20cm ineligible as potential targets; thus they are ignored as far as the rules for firing at the closest target are concerned. The Tribock may not shoot at enemy units that charge it.
Bombard
| Troop | Type | Attack | Hits | Armour | Command | Unit size | Points | Min/max |
|---|---|---|---|---|---|---|---|---|
Bombard |
Art |
0/4+b |
3 |
0 |
– |
1 |
130 |
–/1 |
Shooting: Range 90cm, 4 Attacks + bounce
For siege use only! May not move once it is deployed. Must be deployed before any other unit.
Shooting straight ahead: Other than normal shooting units the bombard has a very restricted view. It can only draw line of sight to targets that lie in a strip that extends straight ahead from the front edge. So the bombard only has a 2cm wide line of sight. For targets outside this strip it must be ordered to turn. If the order is failed it does not fire that turn.
Any Hits caused by the Bombard allow no save. In addition, fortified targets only count as being defended (5+ to hit) and defended targets count as being in the open (4+ to hit).
A Bombard’s shots bounce like a normal cannons. This does not apply when shooting at walls/towers as the stonework will obviously stop the cannon ball and prevent it bouncing. Bombards cannot shoot at charging enemy units.
Bombards may not be used by Elves or Bretonnians.

Mangonel
| Troop | Type | Attack | Hits | Armour | Command | Unit size | Points | Min/max |
|---|---|---|---|---|---|---|---|---|
Mangonel |
Art |
0/4 |
3 |
0 |
– |
1 |
80 |
–/1 |
Shooting: Range 20–90cm, 4 Attacks
For siege use only! Mangonels must be deployed before any other unit and cannot move once deployed.
If firing it fires “straight ahead”. This means it can only draw a line of sight to targets that lie in the strip> that extends straight ahead from the front edge. So the Mangonel only has a 2cm wide [.edit]#line of sight. For targets outside this strip it must be ordered to turn. If the order is failed it does not fire that turn.
Any Hits caused by the Mangonel allow no save.
The Mangonel has a minimum range of 20cm as it is impossible to adjust its mechanism to shoot at closer target. Mangonels can’t shoot at charging enemy units.
Earthworks
These are defensive works built by both defending and attacking forces in a siege and sometimes in other situations as well. These are usually hastily constructed out of earth, log barricades, upturned carts, barrels and whatever else comes to hand.
Each section of earthworks purchased is 40mm long and 10mm wide, half the size of a standard Warmaster base.
Unless otherwise specified in a particular scenario, earthworks are always deployed before the armies set up in the relevant deployment zones, starting with the defender deploying all his earthworks first, or roll off to decide if for some reason there is no defined attacker or defender. Earthworks can be arranged together in whatever formation is desired by the purchasing player.
Earthworks count as a linear feature that confers fortified status against missile fire and defended status against any close combat attacks.
To remove earthworks to make way for your siege towers and battering rams, a unit of infantry (and only infantry) must be adjacent to the earthworks. If the unit is not in combat at the beginning of the combat phase each stand in contact with an earthwork section gets its basic attacks against it (no charge bonuses, as what the troops are doing is getting their entrenching tools out). Any 6s that are rolled will destroy the earthwork that is attacked in this way. It is important that you declare exactly which earthwork sections each stand is attacking, as each 40×10mm section is effectively counted as a separate unit for these purposes.
Log rams
Log rams are effectively battering rams but without the added protection of an armoured covering to shield the battering unit. Log rams can be brought to bear much more rapidly than a battering ram can be. The main disadvantage is, of course, the lack of protection, especially against boiling oil poured on the battering unit by troops on the ramparts above or missile fire from these units.
Attacking infantry units may be equipped with Log rams. When equipped with Log rams a unit may not cross or move through any terrain which is classed as difficult for movement purposes, such as forests or earthworks. A unit that is equipped with Log rams may abandon its Log rams at any point and is then unrestricted by this.
If a unit equipped with Log rams is driven back by enemy shooting or magic and is forced to enter difficult terrain it abandons its log rams and moves on.
When a unit with a Log ram makes contact with a fortress wall it will commence battering in much the same way as a Battering ram. However, if as a result of a boiling oil attack or stand and fire from units on the walls enough hits are inflicted to remove a whole stand then the battering attempt fails. For every wound the unit has to retreat 1cm.
Siege equipment lists
There are three distinct siege equipment lists; the fortification list, the siege equipment list and the siege artillery equipment list. These lists work in the same way, but access to them is dependant upon the specific restrictions of a particular scenario. The scenario special rules will specify exactly which lists may be used by which side.
Earthworks are available to both the attacker and the defender, as are siege artillery.
All equipment is available to all armies of all races in Warmaster for siege battles unless stated otherwise. No army may ever have more than two wallbreaching artillery per 1000 points. Remember that also cannons and rock lobbers count as wall breaching!
Fortification
| Troop | Type | Attack | Structure points | Armour | Command | Unit size | Points | Min/max | Special |
|---|---|---|---|---|---|---|---|---|---|
Gateway |
Building |
– |
12 |
Special |
– |
40mm |
40 |
1/– |
|
Gateway tower |
Building |
– |
12/25 |
Special |
– |
40mm |
150 |
–/– |
|
Wall |
Building |
– |
20 |
Special |
– |
40mm |
55 |
–/– |
|
Sally gate |
Building |
– |
– |
Special |
– |
20mm |
+10 |
–/1 |
|
Tower |
Building |
– |
30 |
Special |
– |
40×40mm |
200 |
–/– |
|
Palisade tower |
Building |
– |
25 |
Special |
– |
40mm |
165 |
–/– |
|
Palisade wall |
Building |
– |
15 |
Special |
– |
40mm |
45 |
–/– |
|
Earthwork |
Building |
– |
– |
Special |
– |
40×10mm |
15 |
–/– |
Règles Spéciales
- 1. Fortification
-
With the exception of earthworks, only defenders are allowed to invest points into fortification.
- 2. Tower
-
The gateway may be destroyed independently with a Structure Point value of 12. If the tower is destroyed the gateway is destroyed with it.
- 3. Sally Gates
-
Sally Gates may secretly be placed in any piece of wall and are not revealed to the attacker until used.
They may not be targeted separately by the attacker and do not weaken the structure of the wall (unless they are open).
One defending unit may cross the Sally Gate per round either on order or initiative. For that reason a defending unit directly touching the Sally Gate may draw a line of sight as if it were invisible.
Whenever a unit leaves or returns by the Sally Gate the defenders need to open and close the gates. Roll 3D6. If the result is equal to or more than the distance of the nearest enemy the Sally Gate counts as open and has to be closed by a successful command.
An open Sally Gate counts as defended.
- 4. Earthwork
-
Gives fortified status when shot at, defended status if in combat.
May be removed by troops in contact by rolling a 6 with their attacks.
Siege equipment
| Troop | Type | Attack | Structure points | Armour | Command | Unit size | Points | Min/max | Special |
|---|---|---|---|---|---|---|---|---|---|
Boiling oil and |
Machine |
– |
– |
Special |
– |
1 |
5 |
–/– |
|
Log rams |
Machine |
– |
– |
Special |
– |
1 |
5 |
–/– |
|
Ladders |
Machine |
– |
– |
Special |
– |
– |
5 |
–/– |
|
Sow |
Machine |
– |
3 |
3+ |
– |
1 |
5 |
–/– |
|
Mantlets |
Machine |
– |
– |
Special |
– |
– |
10 |
–/– |
|
Siege towers |
Machine |
– |
– |
Special |
– |
– |
20 |
–/– |
|
Battering ram |
Machine |
1 |
3 |
3+ |
– |
1 |
10 |
–/– |
Règles Spéciales
- 1. Defenders only
-
Only defenders in a siege scenario may use these.
- 2. Attackers only
-
Only attackers in a siege scenario may use these.
- 3. Mobile
-
Have a move of 15cm. Not driven back by shooting.
- 4. Mantlets
-
Give defended status. Are lost if carrying units are charging or are driven back more than half their move.
- 5. Ram
-
Rams always make one automatic hit when battering.
Siege artillery list
| Troop | Type | Attack | Hits | Armour | Command | Unit size | Points | Min/max | Special |
|---|---|---|---|---|---|---|---|---|---|
Bombard |
Building |
0/4 |
3 |
0 |
– |
1 |
130 |
–/1 |
|
Mangonel |
Building |
0/4 |
3 |
0 |
– |
1 |
80 |
–/1 |
|
Tribock |
Building |
1/6 |
4 |
0 |
– |
1 |
120 |
–/1 |
Règles Spéciales
- 2. Wall-breaching artillery
-
No army may ever have more than two wall-breaching artillery per 1000 points.
All of the following count as wall-breaching artillery: Mangonels, Bombards, Tribocks, Cannons, Skull-Chukkas, Rock-Lobbers, Trebuchets and Earthshaker Cannons.
- 3. Shooting straight ahead
-
May only draw line of sight in the strip that extends straight forward and is the width of the front edge.
Scenarios
Into the breach
‘Into the breach’ can be played on a 1.2 × 1.2m (4′ × 4′) table.
In this scenario the defender should invest about half of his points in fortifications, but only has to pay for the front side of the fortress i.e. the one facing the enemy. The other sides are of no relevance.
Set-up
Note that the defender’s side of the table should be essentially bare; for variety one could put up some ruins outside the castle gate, or the remains of a farm towards the table centre. On the attacker’s side of the table there should be several pieces of whatever scenery is at hand.
The defender sets up first inside the defender’s zone on the castle’s walls, on and inside the towers and gatehouse or even outside the castle.
Attackers may set up outside 40cm of the wall, ready to storm the castle.

There is no breakpoint for the defender, as he has nothing to lose.
The game lasts for 7–10 rounds. At the end of the 7th turn the game ends on roll of 4+. If it doesn’t end repeat the same in the next turn. The game ends automatically after 10th turn is played.
The attacker has the first move.
Victory conditions
The attacker immediately wins if he orders one of his units (not flyers) to move off the defender’s edge between the two shorter castle walls. Note that the attacker can neither win by breaking the defender nor by killing the defenders general.
The defender wins if he breaks the attacker’s army or kills the attacker’s general.
In all other cases the player with the most victory points wins.
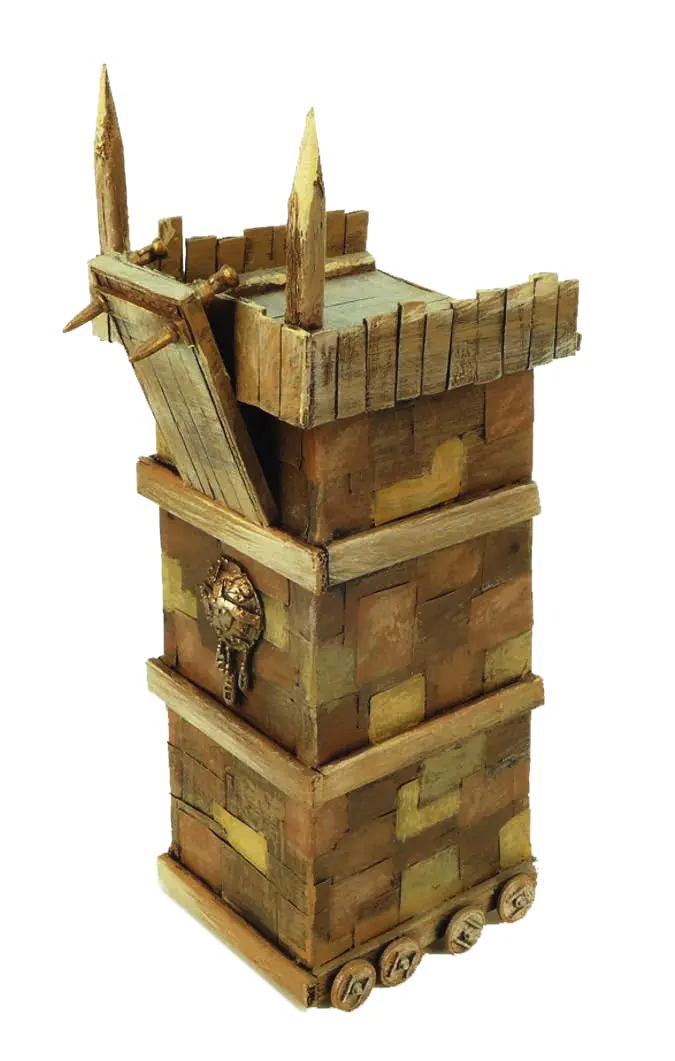
The watchtower
The Watch Tower can be played on a 1.8 × 1.2m (6′ × 4′) table with the Attackers and Relief coming on to the table.
This scenario is played with 2000 points or less on both sides.
The defender may use up to one quarter of his points to defend the watchtower. At least one character has to be part of this contingent. Up to two units may be placed in the watchtower itself – but these units cost three times their normal points. Any other units have to be placed within 20cm of the watchtower. The watchtower costs nothing but it may be equipped with boiling oil for the normal cost. Watchtower troops cannot be broken and do not count towards the defenders breakpoint. The rest of the defending troops are the relief force.
The attacker may only buy sows or mantlets.
Set-up
The watchtower is placed in the middle of the table with the gate facing a narrow table side. The troops defending the watchtower are then placed in or around the watchtower but no more than 20cm away.
The attacker places his troops at a line at least 60cm away of the watchtower’s gate. The attacker has the first turn.

In his first round the defender may declare any unit he can spare as dispatch units. Those units may not be brigaded but can be sent towards his own table edge to get help. Any dispatch unit that reaches the entering edge of the relief force gives a +1 towards the roll to determine if the relief force arrives…
At the start of the second and subsequent turns the defender may roll a D6. On a result of 5+ the relief force arrives. All characters of the relief force may be placed at a line at least 70cm away from the watchtower opposite the attacker. Draw a line across the table at least 90cm away of the watchtower. The relief force may be placed behind this line (if the table is not big enough – play as if the units were placed just outside the table edge). The relief force may be ordered immediately.
Special situations
Characters may not join units defending the tower. Nevertheless they may enter the tower if they are forced to join a unit within 30cm and count as if they had joined a unit. However they cannot add their attacks to any units defending the tower.
Be aware that cannons shooting at troops manning the tower have no bounce-through effect. Also remember that troops within the tower do not roll for drive back and are never confused. If more than one unit mans the tower, the defender may choose which unit gets hit by enemy shooting this turn (declare before shooting dice are rolled). If one unit is fighting against assaulting troops the other unit is automatically the target. During the game units defending the tower may not leave it nor may any defending units enter the tower to restock the troops in there (even if the gate would be accessible).
Victory conditions
The game ends after 8 turns.
At the very moment the Watchtower is conquered the attacker wins. If the attacker destroys enough units to break the defending troops the game is a draw.
If the defender breaks the attacking force he wins. If there is still one stand defending the watchtower at the end of the game the defender wins.